Where to Insulate Your House
Ice dams along the roofline are not a winter wonderland but a telltale sign of costly air leakage. What about tarnished door handles, paint-chipped window frames, and faded siding? These conditions not only lower curb appeal and the home’s value. They may also indicate costly air leaks that keep utility bills higher than necessary. By the time door hardware shows signs of age, weather stripping is worn and gaps have compromised thermal performance. Chipped paint allows moisture to penetrate windows and freeze, warping the frame and making them difficult to operate. When faded or buckled siding shows the exterior has suffered from prolonged exposure to extreme weather, what is the condition of the insulation underneath—is it even insulated? Small signs of wear can indicate larger issues. The amount of solar radiation entering a house as heat is called Solar Heat Gain Coefficient or SHGC. The lower the number, the better a product is at maintaining the temperature of living space. U-factor represents the heat flow rate through a window expressed in BTU under winter conditions of 0°F outside and 70°F inside. Energy Star products are performance tested and only those meeting or exceeding energy efficiency standards qualify. The roof, siding, windows, doors, and insulation are systems designed to protect your house from the elements and are available with the Energy Star designation. You can trust that every system bearing the Energy Star label will maximize performance and savings. Choosing Energy Star means you don’t have to worry about the parts you can’t see.
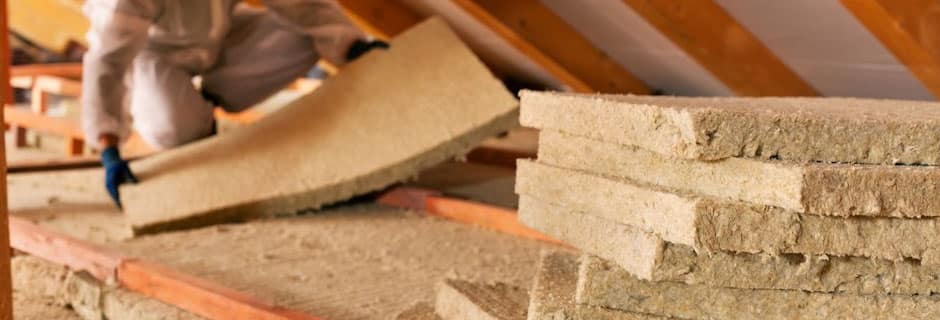
Insulating Your House
Unless your home was specially constructed for energy efficiency, you can probably reduce your energy bills by adding more insulation. Many older homes have less insulation than homes built today, but even adding insulation to a newer home can pay for itself within a few years.To determine whether you should add insulation, you first need to find out how much insulation you already have in your home and where it is. A qualified home energy auditor will include an insulation check as a routine part of a whole-house energy assessment. An energy assessment, also known as a home energy audit, will also help identify areas of your home that are in need of air sealing. (Before you insulate, you should make sure that your home is properly air sealed.)If you don’t want an energy assessment, you need to find out the following for yourself:Where your home is and is not properly insulated
What type of insulation you have
The R-value and the thickness or depth (inches) of the insulation you have.* If you live in a newer house, you can probably get this information from the builder. If you live in an older house, you’ll have to inspect the insulation.*Thickness must not be used as the sole factor in determining the R-value of loose-fill insulation, particularly for attic insulation.
How Much Insulation is Enough?
The first 3 incges of home insulation you add to a bare ceiling or wall will yield huge savings. Adding another 3 inches will increase energy savings, but not to as great a degree. For charts showing the Department of Energy’s optimal amounts of home insulation to install, check the insulation manufacturers association at naima.org. Their recommendations are based on climate, fuel costs, and other factors. Adding more will give you a diminishing return on your investment.The payback period for retrofitting home insulation varies greatly, but studies show that added insulation usually pays for itself in saved energy costs within 5 to 10 years. In Minnesota, a typical payback period might be five or six years. Payback in more temperate areas takes longer, but remember that home insulation reduces air conditioning costs too.
Inspecting and Evaluating Your Insulation
Check the attic, walls, and floors adjacent to an unheated space, like a garage or basement. The structural elements are usually exposed in these areas, which makes it easy to see what type of insulation you have and to measure its depth or thickness (inches).Inspect the exterior walls by using an electrical outlet:Turn off the power to the outlet.
Remove the outlet cover and shine a flashlight into the crack around the outlet box. You should be able to see if there is insulation in the wall and possibly how thick it is.
Pull out a small amount of insulation if needed to help determine the type of insulation.
Check outlets on all floors as well as old and new parts of your house. Just because you find insulation in one wall doesn’t mean that it’s everywhere in the house.
Inspect and measure the thickness (inches) of any insulation in unfinished basement ceilings and walls, or above crawlspaces. If the crawlspace isn’t ventilated, it may have insulation in the perimeter wall. If your house is relatively new, it may have insulation outside the basement or foundation walls. If so, the insulation in these spaces won’t be visible. The builder or the original homeowner might be able to tell you if exterior insulation was used.
Once you’ve determined the type of insulation you have in these areas and its thickness (inches), see the U.S. Department of Energy’s online Insulation fact sheet to determine the R-values of insulation previously installed in your home.
Determining Recommended R-Values
When you find out the R-values of your insulation either from an energy assessment, the home builder, or your own inspection, you can then use the Home Energy Saver tool to determine how much insulation you should add and where you should add it for maximum energy efficiency.
Estimating Insulation Costs and Payback
The Home Energy Saver calculator also provides recommendations on energy upgrades, including insulation, and their rate of return.
Insulating Your Home
Insulation — silently hidden in your walls, no moving parts to fix — is a material you probably spend precious little time thinking about. Then along comes subzero (or sweltering!) weather, a three-digit utility bill, or chilly drafts, and you start thinking about it a lot! At home, you ponder whether it’s worth the time and expense to add it to your ceilings, walls, and basement. At the store, you ponder which type, thickness, width, and density to buy. And when you install it, you wonder just how good is “good enough.”We asked home insulation manufacturers and installers which questions they field most—and which blunders they see most. Following are six things they (and we) think you should know.
Seal Up Air Bypasses First
Attics are one of the easiest and most cost-effective places to add home insulation. But you’ll increase the effectiveness of home insulation substantially if you first seal up air bypasses (Fig. A) around chimneys, plumbing vents, wires, interior walls and exhaust fans — places where warm, moist interior air escapes into the attic.Heat has a natural inclination to both rise and migrate to colder areas. Combine these two tendencies and you can see why air bypasses can reduce the effectiveness of attic insulation by 30 to 70 percent. You can track down bypasses by lifting existing attic insulation and checking for dark patches of moisture or dust. Or head to the attic on a cold day and feel for pockets of warm air or use a stick of incense to check for drafts.Before installing (or adding) attic insulation, take these steps:Use caulk and expanding foam (the fire blocking type) sealant to close air gaps around pipes, ducts and electrical wires where they enter the attic. Use the fire-blocking type.
Cut and fit strips of 24-gauge sheet metal between the masonry chimney and the surrounding wood framing. Use high-temperature caulk to seal the flashing where it meets the chimney.
Install weather stripping around the perimeter of the attic access opening, then use screw hooks to pull the hatch tight against the weather stripping. Glue rigid extruded foam home insulation to the top of the hatch.
Careful Installation Increases the Insulation’s R-value
Leaving 5 percent of a wall uninsulated will reduce the entire wall’s R-value (resistance to heat flow) by 20 percent. It doesn’t take much more time to install fiberglass insulation properly. The most important steps you can take:Fill the stud cavity from top to bottom and side to side. To avoid guesswork when insulating walls built from standard 92-5/8 inch long studs, purchase and install precut fiberglass batts that are 93 in. long and 15 in. wide. When you have to custom-cut batts at wall corners and other places, cut the batts 1 inch higher and wider than the cavity you’re filling.
Split your insulation so half goes in front of and half goes behind electrical wires. Compressing insulation reduces its R-value.
Around electrical boxes, notch, rather than compress, the batt—then tuck the cutout behind the box. To help prevent frozen pipes, insulate only on the cold side.
Don’t Need Kraft-faced Insulation
Kraft paper — the asphalt-impregnated brown paper facing available on insulation — is rarely called for these days. When insulation was first developed, it was only an inch or two thick and the attached kraft facing was stapled to studs to keep it from sagging. Insulation today is so “full-bodied” and fills stud and joist cavities so completely that it resists settling—even when walls have been purposely vibrated in tests.Kraft paper does act as a vapor retarder to slow the movement of interior moisture through the wall cavity and insulation. But for a thorough job, especially in bathrooms and other high-moisture areas, a continuous 6-mil plastic sheeting vapor barrier is much more effective. Kraft paper still serves the purpose of temporarily holding the insulation in place on horizontal or sloped surfaces. And when you’re retrofitting insulation in the floor of a crawlspace (Fig. D), installing the kraft-faced insulation paper side up provides an adequate vapor retarder. Kraft paper and its underlying asphalt adhesive are flammable and should always be covered with drywall or other fire-resistant material.Another important point: Except in hot coastal regions, insulation should be installed with the kraft paper (or plastic vapor barrier) on the interior side of the wall. In hot regions, vapor barriers are often eliminated or positioned toward the outside of the stud wall. If in doubt, consult a local building inspector.
High-density Home Insulation Can Pay Off
Insulation is rated according to its R-value, or resistance to heat loss: the higher the R-value, the higher the insulating value. Standard fiberglass insulation has an R-value of about 3.5 per inch of thickness; this provides an insulating value of R-11 for 2×4 walls and R-19 for 2×6 walls. But if you’re serious about energy savings, you can buy better-performing products. High-density types of fiberglass insulation, with more fibers and air spaces per square inch, offer R-values of up to 4.25 per inch. Some provide R-15 for 2×4 walls and R-21 for 2×6 walls. There’s also high-density insulation for ceilings and attics. You’ll wind up paying more and in some cases you’ll need to special-order it, but high-density insulation delivers up to 35 percent more insulating value per inch.You can also pack 5-1/2 inch thick insulation into a 3-1/2 inch thick wall to increase its R-value, but the compressed R-19 batt will only yield an R-value of about 17, and it will make it more difficult to get drywall flat against the wall.
Vent Attics and Crawlspaces
Since home insulation changes the way attics and crawlspaces “breathe,” it’s critical that you maintain or install proper ventilation. At first, it seems odd to add insulation for warmth and then purposely create ventilation “holes” for cold air to enter. But if you don’t do this, you’re setting yourself up for moisture problems.When you add insulation to attic rafters and attic floors, it’s important to maintain at least a 1-in. continuous air space between insulation and roof sheathing, from eaves to ridge. This air space flushes out moisture. It also helps maintain a “cold roof,” which prevents ice dams from forming in the winter and excessive heat from damaging shingles and increasing cooling costs in the summer. The biggest mistake homeowners make with installation is to install it so it blocks the flow of air at the eaves. The best way to avoid this problem is to install inexpensive air chutes to keep the space open.Newly insulated crawlspaces also need proper ventilation. The standard procedure is to insulate the ceilings of unheated crawlspaces and the walls of heated crawlspaces. To reduce moisture migration if there’s no slab, a 6-mil polyethylene vapor barrier should be laid on the ground in both cases. At least 1 square foot of ventilation should be installed for each 1,500 square feet of floor area. For more information, see How to Install a Vapor Barrier in a Crawl Space. There are regional differences and various codes and interpretations for insulating crawlspaces and attics. Contact a local building official to make sure your house stays code-compliant.
Required Tools for Insulations
Have the necessary tools for this DIY project lined up before you start—you’ll save time and frustration.
- Dust mask
- Flashlight
- Hammer
- Safety glasses
- Straightedge
- Utility knife
How do you decide whether you need insulation?
First determine if you have insulation. It’s easy to confirm whether or not you have attic insulation—usually loose fill between ceiling joists or exposed batts of colored fiberglass. You can also check your exterior walls for a series of patched holes. This is a tell-tale sign of blown-in insulation.Old houses can be drafty places, and warm air can leak from a multitude of areas. Check and see where you may be losing heat in your house. Chimneys and fireplaces without working dampers are typical. Other areas to consider are air leaks though cracks around windows, ducts, electrical outlets, and recessed lighting.Note that the primary site of heat loss is through the top of the house. Heat rises and can escape though roofs that are not adequately insulated.
What do you do with existing insulation?
A friend reopened sealed pocket doors on the top floor of his 1900 triple-decker in Boston recently and from inside the walls—along with the pocket doors—came shredded paper. In the late 1800s primitive insulation could be comprised of a number of mundane materials, such as newspaper, wood shavings, corncobs, and even seaweed. Mineral wools—substances like rock slag “spun” into fibers—were also installed in houses as early as 1875 and are still in use today. These early materials can be left in place.The insulation materials introduced in the mid-20th century containing asbestos and urea-formaldehyde, create the most concern in old houses today:
Asbestos
Asbestos was a common component of heating system insulation by 1910, and by the 1930s it was also being added to some building insulation products. If you suspect your home has insulation containing asbestos, a known carcinogen, have the material tested. Complete removal of this insulation would be too invasive to most old houses so it should be left alone—unless your project is a total rehab and you’ll be removing walls and ceilings. If the asbestos is flaking, you can encapsulate the material—remember asbestos fibers are a health concern only when airborne.
Urea-formaldehyde
Urea-formaldehyde, a combination of resin, hardener, and compressed air developed as an insulation material in the 1970s, was foamed into closed wall spaces. It was largely discontinued in the 1980s due to concerns of off-gassing as the product cures, but today we have a better understanding of the product and that the amount of vapors produced is finite. After the initial curing the material will not off-gas, unless it comes in contact with water or moisture, then it can break down and begin off-gassing once again. You can have your home tested for these vapors by an environmental company in your area.